
Attachments & Practical Tips
Will a Mini Excavator Fit Through Your Side Gate?
Measure the opening, the complete access route and the working area before choosing a mini excavator for a residential job.
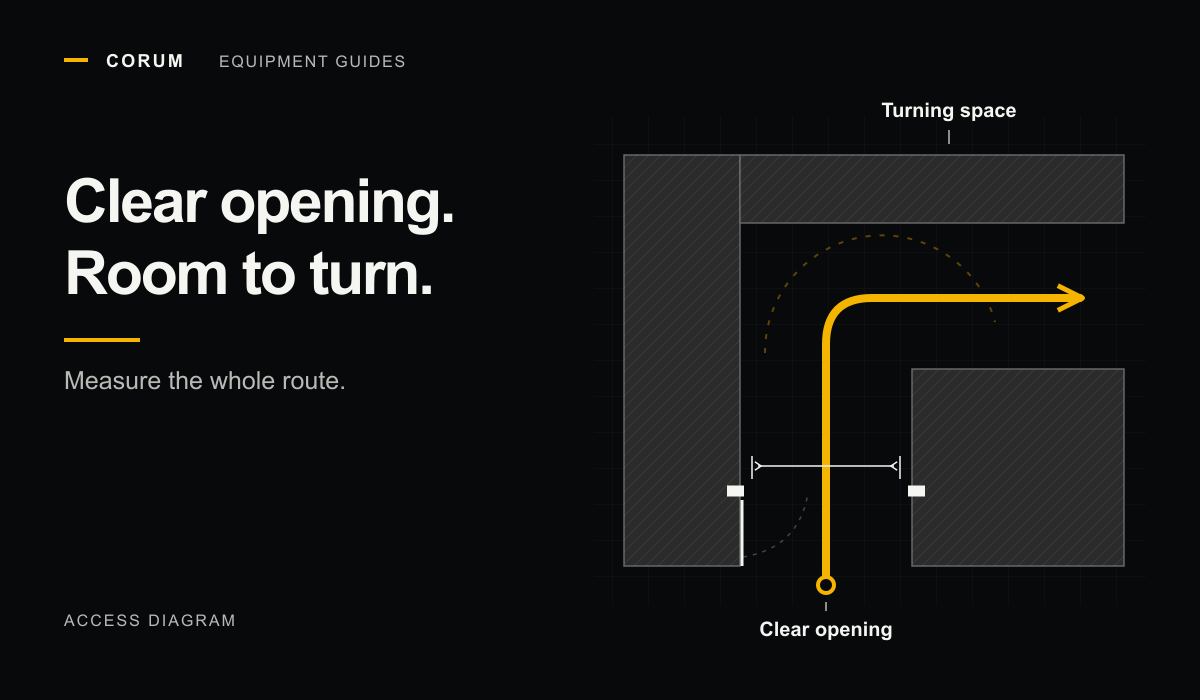
A mini excavator can fit through a side gate only when its travel width, height and turning space suit the entire route to the work area. Start with the narrowest clear opening, then check every corner, overhead obstruction and surface beyond it. A gate that is wider than the machine is a starting point, not a complete access plan.
Use the model specifications on this page alongside your own measurements. The aim is to identify a practical route before choosing a machine, arranging transport or removing anything from the property.
Measure the opening you can actually use
Open the gate fully and measure between the nearest fixed obstructions. Posts may be farther apart than the usable gap once hinges, a latch, a folded gate leaf or a downpipe are included. Check at track level and higher up: a projecting meter box or fence cap can narrow the route above the ground.
Record the smallest measurement, its location and the unit used. A photograph with a tape measure helps explain an awkward detail, but keep a written measurement as well. Measure the approach and exit too, especially if the machine cannot travel straight through.
Compare clear opening width with the machine's width in its intended travel configuration. Ask whether any quoted width refers to a particular track setting or configuration. Do not assume a machine has retractable tracks or that removing a component is an approved way to gain clearance.
Follow the route beyond the gate
Walk from the unloading position to the excavation area. Note tight corners, steps, changes in level, air-conditioning units, taps and established plants. A long, narrow passage followed by a sharp turn can be more restrictive than the entrance itself.
Draw a simple plan showing the straight sections and bends. Add measurements at each pinch point and photographs looking in both directions. The machine's length and the position of its boom and attachment matter when negotiating the route; width alone cannot describe the space it needs.
Leave the final clearance assessment to the person planning and carrying out the movement. There is no universal spare-width allowance that makes every gate safe: visibility, surface condition, the route and the ability to stop or reposition all affect the decision.
Check height and the ground beneath it
Look for eaves, pergolas, branches and other overhead obstructions throughout the route. Match clearance to the machine in the travel position specified by its operating instructions. Do not treat folding or removing a protective structure as a routine shortcut.
Powerlines need a separate assessment. Their safety requirements cannot be reduced to whether the canopy appears to fit underneath. WorkSafe Victoria's guide to mobile plant near overhead electrical assets explains site assessments and no go zones.
At ground level, identify soft or recently filled areas, cross-slopes, drains, pits and fragile paving. Include any crossing beside a retaining wall or excavation. Ask a competent person to assess doubtful support; a neat paved surface does not by itself establish that it can carry the machine.
Plan the work area, not just the arrival
Once inside, the excavator still needs room to position, work and leave. Identify where the upper structure and attachment will move, where people can remain clear, and where excavated material will go. A machine can pass through a gate yet be unsuitable for the digging position beyond it.
For excavation, obtain service information and follow the relevant asset-owner instructions before work starts. Before You Dig Australia explains that plans indicate nearby infrastructure rather than its exact position, and may not include every asset. Arrange appropriate locating and protective measures.
Also plan how buckets and other equipment will reach the work area. Repeatedly carrying material through the same narrow passage can affect the job more than the first trip through the gate. Include that movement in your layout.
Prepare this access checklist
- Opening: the smallest clear width, with the gate fully open.
- Height: the lowest obstruction along the complete route.
- Corners: a measured sketch of approaches, bends and exits.
- Ground: photographs of slopes, paving, pits and soft areas.
- Work area: the digging position, nearby structures and spoil location.
- Arrival: the proposed unloading position and route from it.
Then compare the relevant dimensions for CR10, CR10e and CR12. These are models to assess against your measurements, not a promise that any particular gate will suit them. For digging reach, transport and broader machine selection, continue with the Compact Excavator Size Guide.
Discuss your access plan with CORUM Equipment. Include your measurements and a short description of the work so the conversation starts with the site.
Machines in this guide
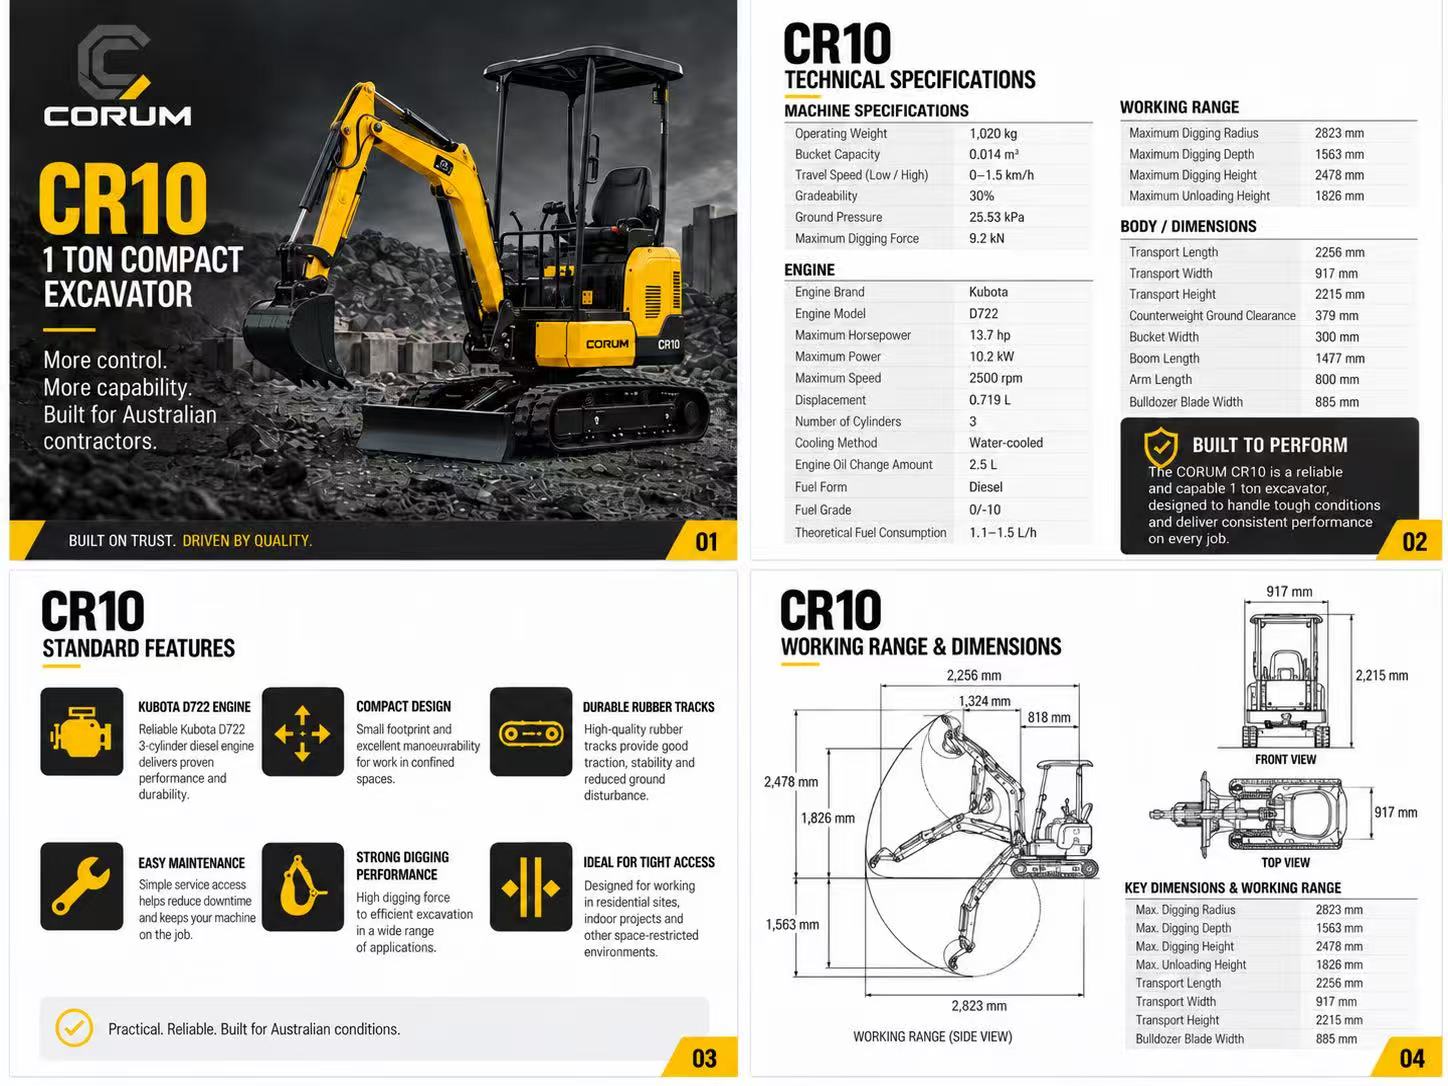
CR10
- Operating weight
- 1,020 kg
- Width
- 917 mm
- Height
- 2,215 mm
- Length
- 2,256 mm
- Engine
- Kubota D722
- Controls
- Pilot controls
- Engine power
- 10.2 kW
cr10
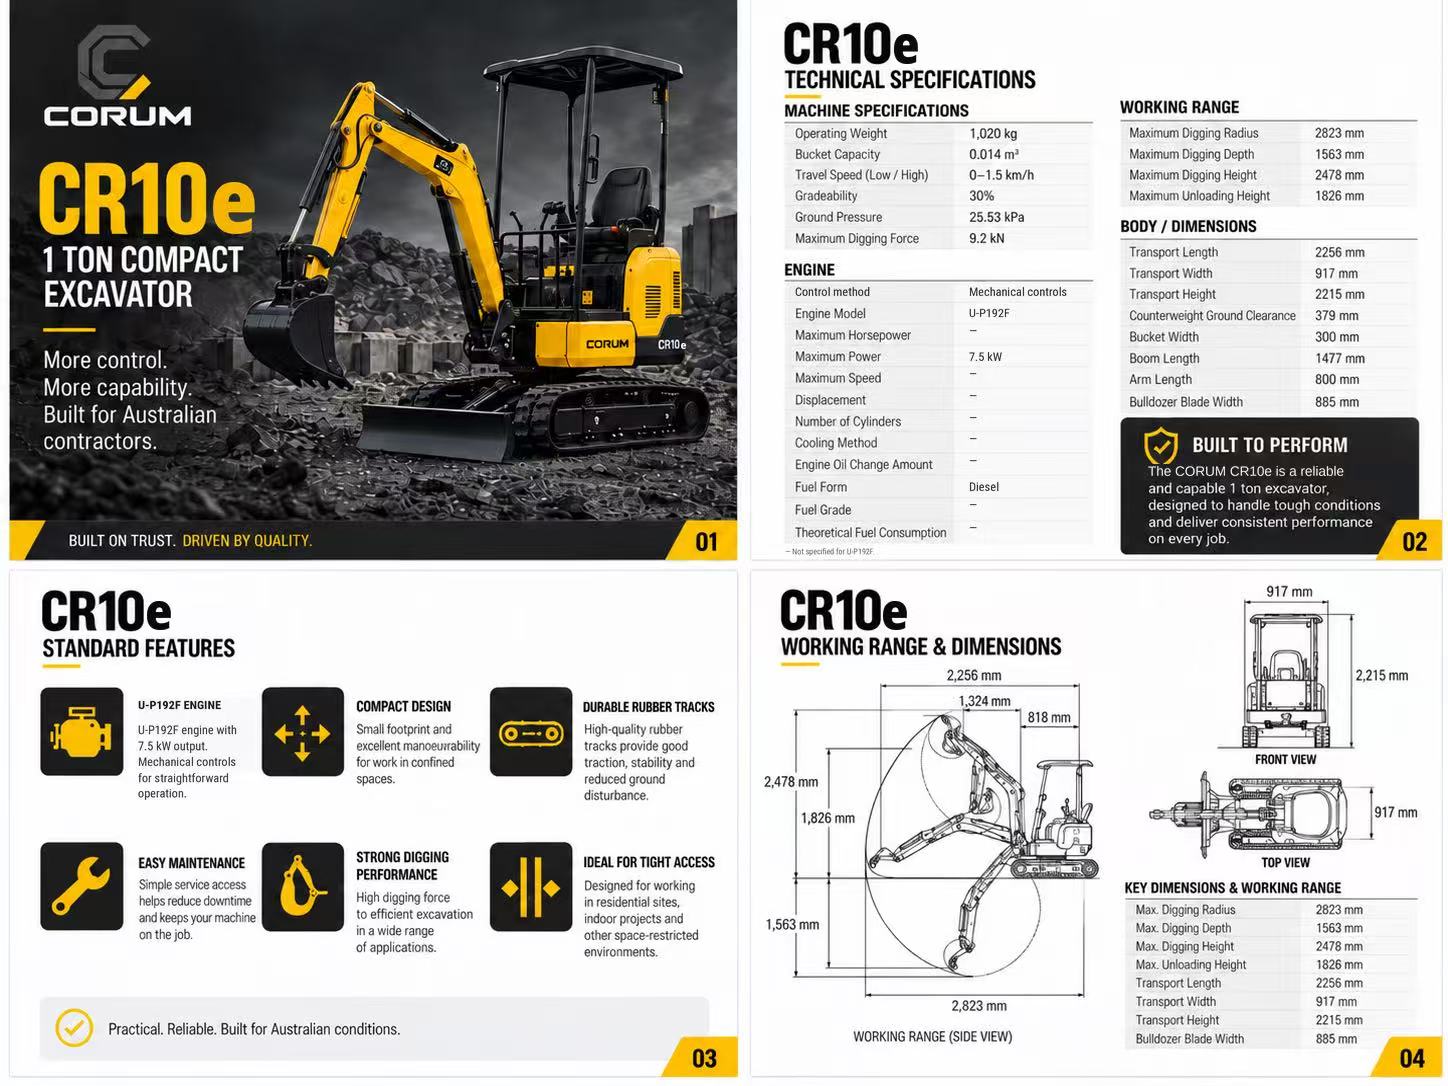
CR10e
- Operating weight
- 1,020 kg
- Width
- 917 mm
- Height
- 2,215 mm
- Length
- 2,256 mm
- Engine
- 192F
- Controls
- Mechanical controls
- Engine power
- 7.5 kW
cr10e
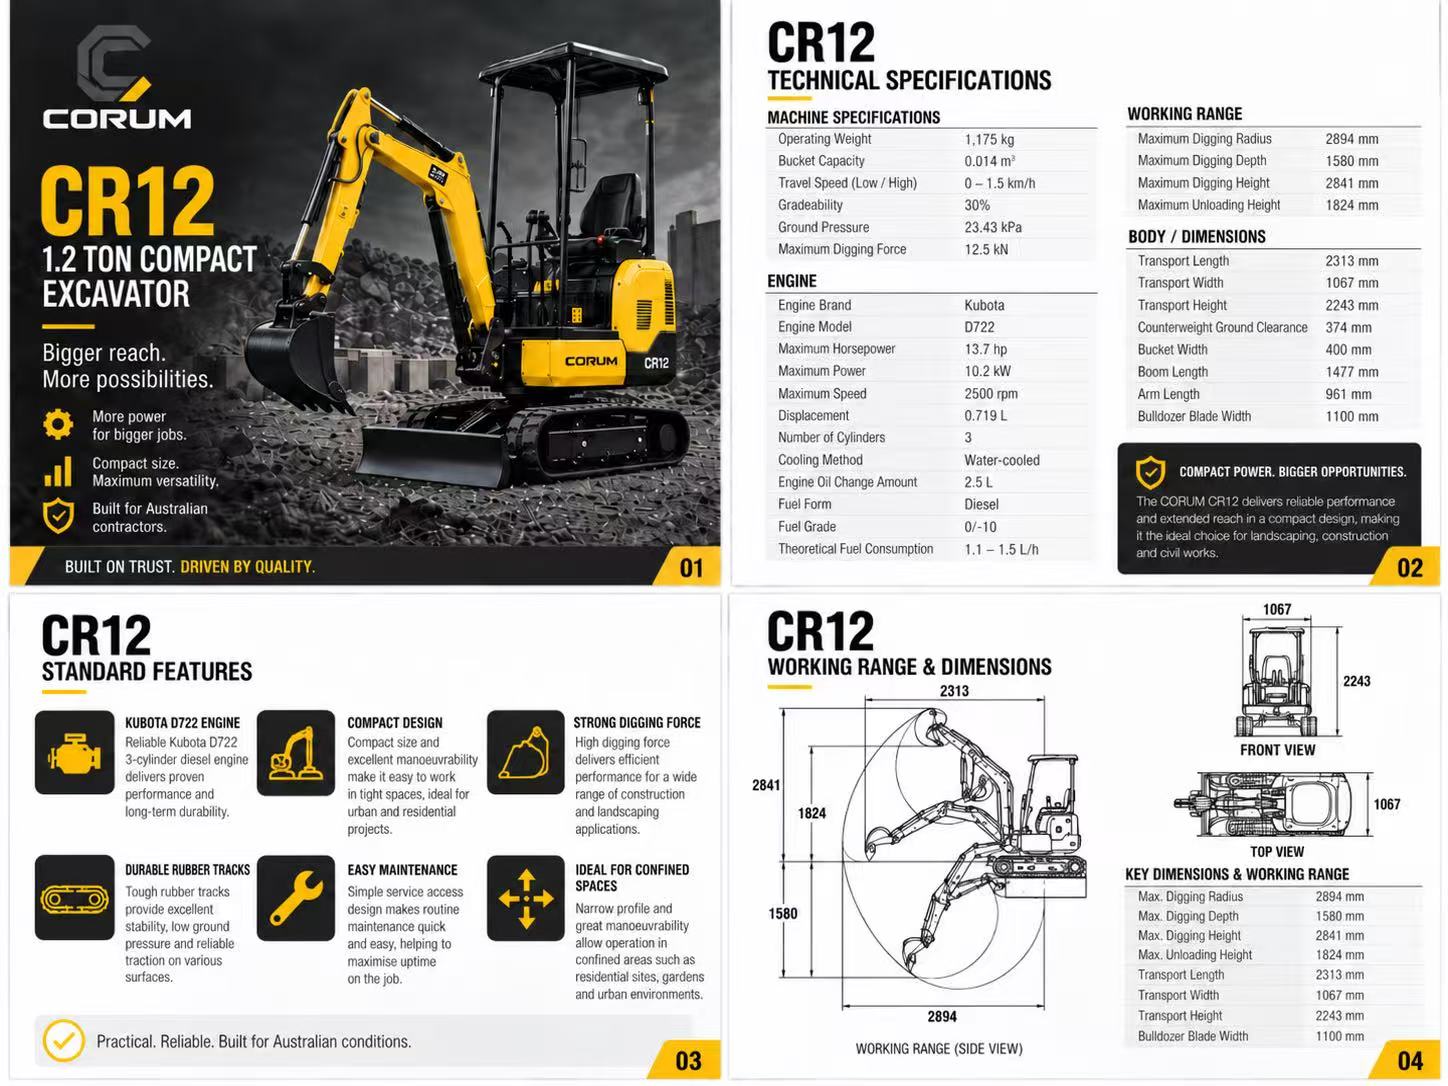
CR12
- Operating weight
- 1,175 kg
- Width
- 1,067 mm
- Height
- 2,243 mm
- Length
- 2,313 mm
- Engine
- Kubota D722
- Controls
- Engine power
- 10.2 kW
cr12
Sources & further reading
- Before You Dig Australia — Best Practice Guidelines. Reviewed 30 September 2026.
- WorkSafe Victoria — Using powered mobile plant near overhead assets. Guidance reviewed by WorkSafe on 29 August 2024; checked for this article on 30 September 2026.
- CORUM model specifications: CR10, CR10e and CR12.
Sources checked